

Inkscape tutorials | How to draw a scroll

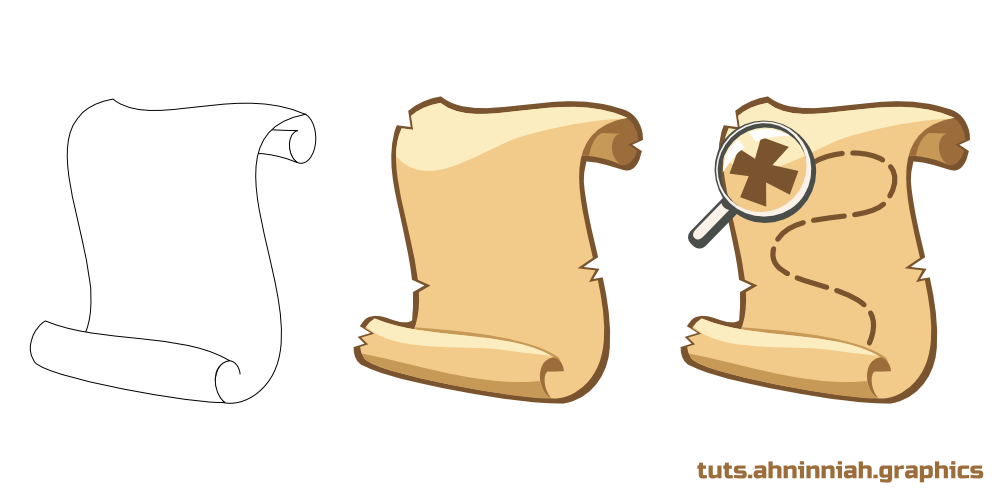
Today we take a look at process of creating a scroll. This may be a scroll with a magic spell or treasure map as an ingame element or an icon. Such tools as Spiral Tool, Pencil Tool and several path operations will help us in this.
Though I’ll be using Inkscape to show the process, the principles given below can be more or less applicable to drawing process in any other vector editor. This is not the only way, it's just how I do it.
Basic shape
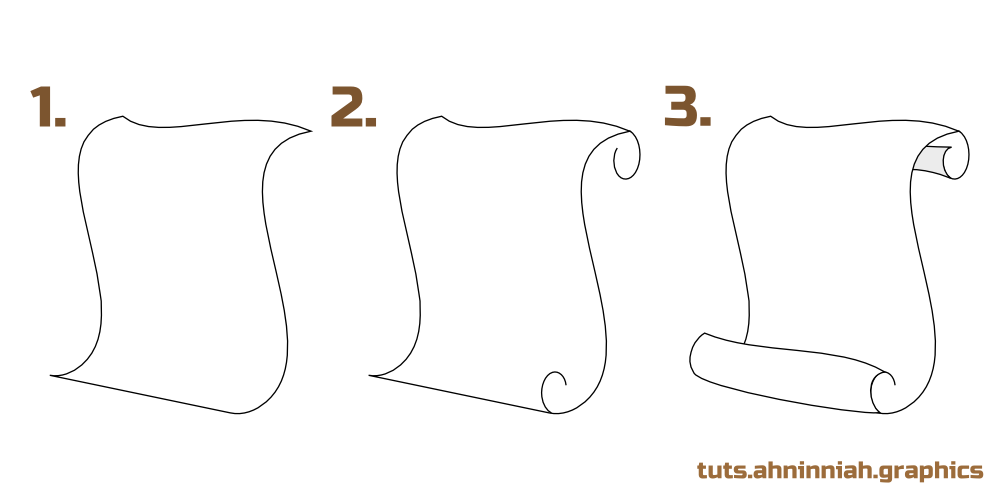
1. Take Pencil Tool (F6) and draw one side curve line. You can also use Bezier Tool (Shift + F6) and ‘from node to node’ method as well...
I have not quite standard pencil settings, I set its smoothing to 50%. With this setting, my hand line is more curved and have a less number of nodes, so it’s much easier to edit paths.
... duplicate created curve line, move it to the side so you could imagine two sides of the scroll and scale it down a little. Grab Nodes Tool (F2) and connect two top and two bottom nodes using “Join selected endnodes with a new segment” button at the Tool Controls Bar. Curve the upper line a little.
2. Take Spiral Tool (F9) and create two shapes at the top and at the bottom of the scroll to get the effect of a curled paper. Adjust the Spiral shapes with Inner and Outer handles using Spiral Tool (F9) or Nodes Tool (F2).
3. Draw other curled paper elements using Pencil Tool: the front bend and the back one. According to the angle at which we see the scroll, the back bend is barely visible, so there is no need draw it entirely. A hint of it’s presence will be enough.
Coloring
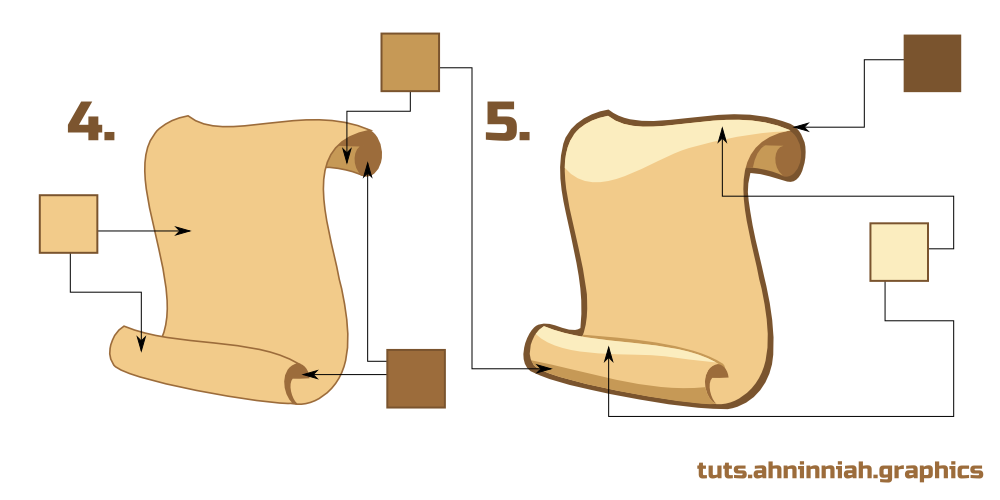
4. We will use warm colors which have nothing to do with the color of the new paper. However, in such colors the scroll looks more ancient. Convert spirals to paths (Shift + Ctrl + C) and complete their shapes with Pen Tool to make their paths closed.
You can download SVG-file with color palette for practice here
5. The light is coming from the top left, so we should add highlights and shadows to the top of the scroll and to the front bend. You can learn more about Highlights and Shadows from my earlier tutorial. The darkest color from the palette will help us to make scroll stand out. Select all scroll elements, duplicate them (Ctrl + D) and go to Path > Union. Scale the object up, fill it with dark color and ‘Lower it to Bottom’ (End key). ‘Simplify the Path’ (Ctrl + L) to get rid of unnecessary nodes and then adjust the shape.
More details
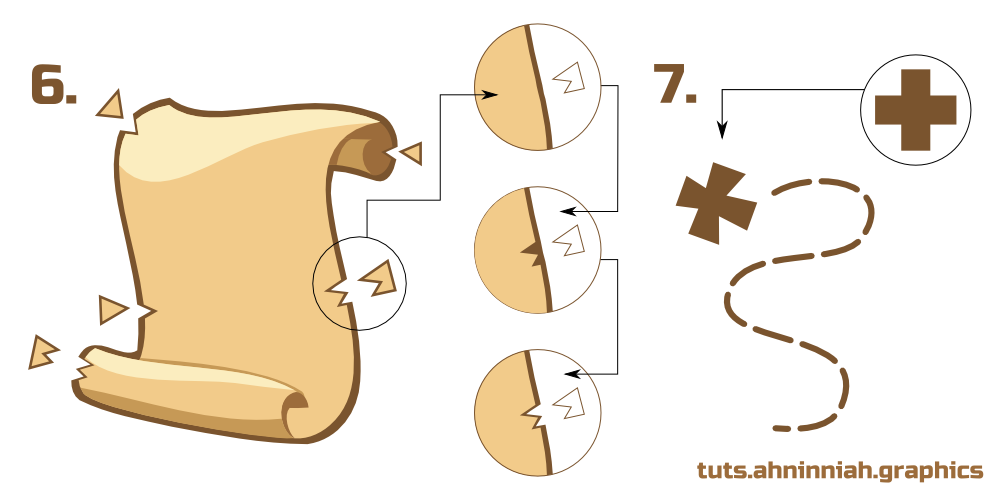
6. In addition to special color palette we need to add some torn places to make the ancient scroll. Grab Bezier Tool (Shift+F6) and draw triangular shape. Duplicate this shape and create difference with edge of the scroll using ‘Difference’ path operation. Grab the original triangular shape, scale it down and create difference with outline. Use this method to create torn places anywhere on the scroll where you like.
Treasure map
7. It’s very easy to create a small treasure map. For this we need to create a cross using two rectangles. Also we need one line with dashed pattern. We can set pattern to the path in Stroke Style tab in the Fill and Stroke Dialogue (Shift+Ctrl+F).
Magnifying glass
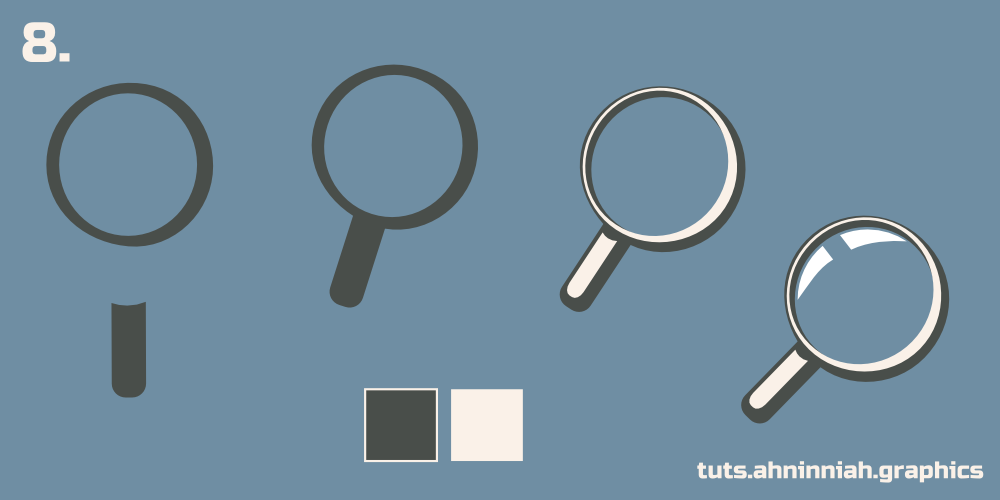
8. Basic elements of the magnifier are circles and a rectangle with rounded corners for a handle. Use Ellipse Tool (F5), Rectangle Tool (F4) and Difference operation to form magnifier. Don’t forget to add a highlight for the glass.
Video process
Here is a video process of creating a scroll. Take a look, if you got stuck on something.
That’s all for now! Please, post your results in the comments. And if you like this tutorial, please, share it :)
* Download this tutorial in PDF
buy