

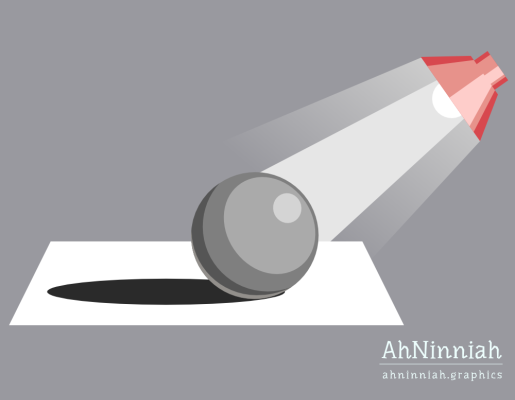
Highlights and Shadows: 7 steps to make your object more realistic
Highlights and Shadows - it’s something that you add to the character after creating the whole outline and filling with solid colors. They really help to make your character’s shape more readable and 3D-dimensional.
Note: We’ll be using Inkscape to learn the basics.
Basic shape
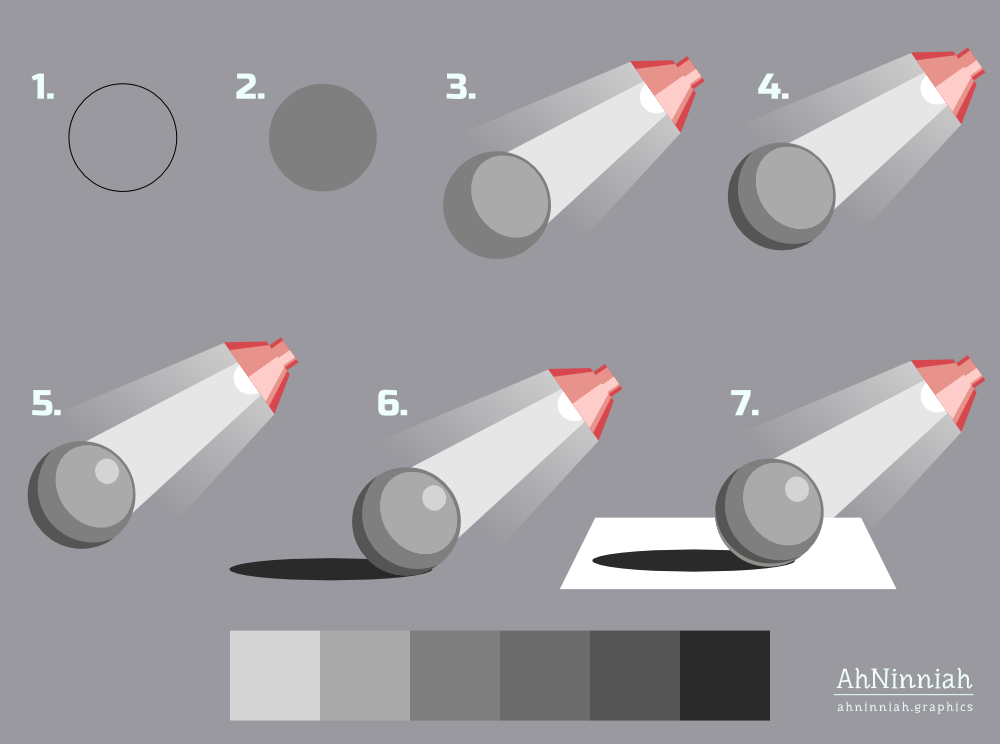
1. Create a basic shape with ellipse tool (F5). Hold down the Ctrl key while dragging the mouse down to get a perfect circle
Flat color
2. Fill the circle with flat color and remove the stroke
Flat color - the color which doesn't have any shading. We’ll be using a grayscale (shades of grey) as our color palette. This way will help us practice adding depth to our drawing while not distracting on choosing colors.
Light source
3. Decide where the light source is. Duplicate the circle (Ctrl+D), scale it down and place it in the direction to the light source
Light source - is where the light comes from. It could be a desklamp, The Sun or any other object that emits light (there is always at least one source of light, otherwise we can't see anything). Knowledge of its location influences the whole drawing.
Shadow
4. Duplicate circle with flat color twice. Move the upper duplicate slightly to the side. Change it’s color for more readability. Select both circles and go Path > Difference
Shadow - is a part of an object which doesn’t receive enough light or light is missing at all.

Highlights
5. Duplicate the light elipse, scale it down and squeeze a little (it has almost round shape). Place it at the very edge
Highlights are placed where the light hits the most convex and closest to the source part of the object.
Cast shadow
6. Now our sphere has a sense of depth. To indicate that the object is located on a plane or a surface, it’s necessary to add a shadow underneath it - the cast shadow. Duplicate circle with flat color, squeeze it and place under other circles.
The location of the light source affects the cast shadow. The further the light source is - the longer and less detailed the cast shadow will be.
Reflected light
7. Repeat the 4th step to create a reflected light. Place it on a sphere near the surface.
Reflected light - the light that reflects from the plane or surface back onto the object, what makes the shadow side a little bit lighter at the edge.
That’s all for now! Please, post your results in the comments. And if you like the tutorial, please, share it :)
* Download this tutorial in PDF
buy