

Inkscape | Workflow Tips
Today I want to share with you some workflow tips in Inkscape from my own experience. I hope they will help to simplify and accelerate the process of creating your new art.
Use sketches
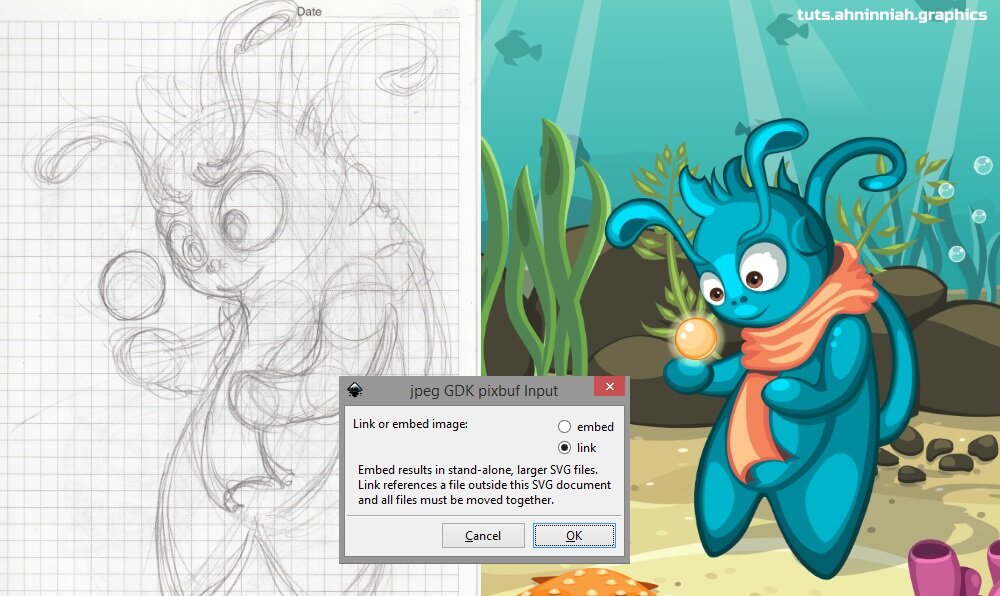
It’s mush easier to create drawing based on a sketch (enough detailed, so you can develop it further), than to draw immediately in Inkscape only using an image from your head. It’s good for some experiments (when you don’t know what you’re going to create), but not for the exact result you want to get. As for me, I create pencil sketches and then make them digital (scan, photo).
In Inkscape you can Import your sketch using File > Menu or just using Drag and Drop. The pop up dialogue will offer you to link (put a link to reference outside the SVG-file) or embed your image (as a stand-alone object). If you link the sketch, make sure to not remove image from it’s folder, otherwise Inkscape will loose it. If you embed it, then your SVG-file size will be significantly increased.
Flip the image or object
When you work for a long time on something, there comes a point when you stop see the mistakes in your work. You probably feel that something isn’t right, but you can’t find what exactly. You have lost sharpness and freshness of vision. The best way to avoid mistakes in you proportions or volume is to flip the image (to change the usual angle).
In Inkscape you can Flip object Horizontally, by using the Flip Button on the Tool Controls Bar or pressing H key on you keyboard.
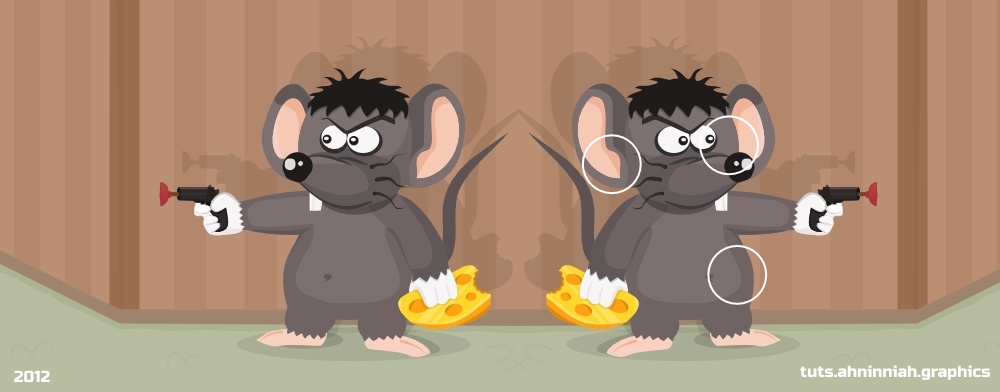
As you can see at the example picture, there are some issues with proportions, shapes and coloring.
Background color
Inkscape has white as a default canvas color. But white and black colors are very contrast. If you create a game character on white background, then most likely it’ll have unsuitable colors for it. Instead, you can use grey color or the background of your game.
To change page background color in Inkscape, you need to go to File > Document Properties (Page Tab). Here are some codes of grey colors: light grey (999999ff), grey (717171ff), dark grey (262626ff) and deep grey/almost black(101010ff). My background color is set to 99999ff0.
In order not to change background color every time you open a new document, you can change the default Inkscape template (\Inkscape\share\templates). Make sure to save a copy of default.svg file before making any changes, just in case.

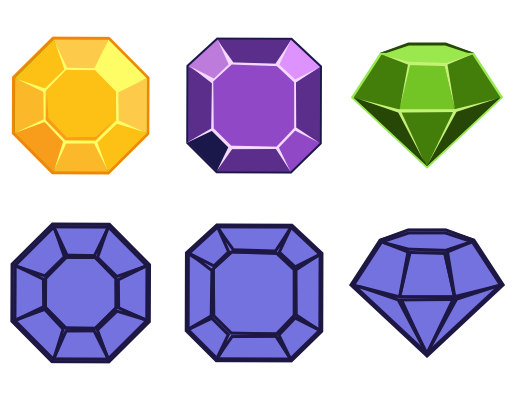
Paste Style
Inkscape has a great option, that can help you speed up the process of coloring - Edit > Paste Style (Shift + Ctrl + V). For example, if you have many objects that need to be colored in the same way, just copy one with desired result to your clipboard and use this option.
Easy color adjustment
If you have several objects in one color and you may want to adjust their colors later, you can unite them Path > Union and then change the color of all at once. After you are done with colors, just go Path > Brake apart (It only works, if you objects do not overlap). Another way, is to set up a good object structure using Layers (Shift + Ctrl + L).
Bonus
And here is some bonus tip: I came up recently, that Inkscape can apply color to the object thought Ctrl+V, if I have a color code in my clipboard. That’s really helpful for me, because I very often apply colors from the online color palettes, before I find the right one.
That’s all for now! If you like the tutorial, please, share it :)