
Inkscape tutorials | How to draw bottle with potion
 At this time, let’s create a potion bottle. Imitating glass material and transparency can be very challenging task. And we’ll use simple shapes and colors to get the desired result.
Though I’ll be using Inkscape to show the process, the principles given below can be more or less applicable to drawing process in any other vector editor.
Basic shape
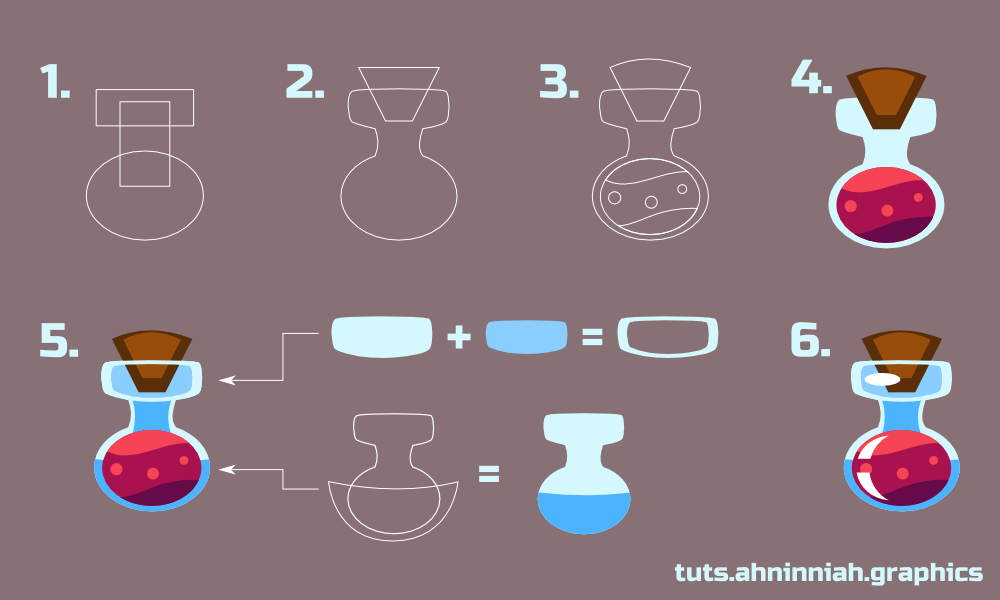
1. Create basic shape with Ellipse Tool (F5) and squeeze it from above. Use Rectangle Tool (F4) for the neck.
2. Unite created paths through Path > Union. Grab a Bezier Tool (Shift+F6) and draw basic cap shape using ‘from node to node’ method. With Node Tool (F2) make nodes of the neck more smooth.
3. Draw another ellipse for potion liquid. We did not make it back to back, in order to show some wall thickness of the bottle. Draw two wavy shapes at the top and at the bottom of the potion.
Make sure that the shapes are closed paths and they are bigger than the ellipse
Use Path > Intersection to adjust their shape. Add different bubbles with Ellipse Tool. Make upper nodes of the cap smooth.
Coloring
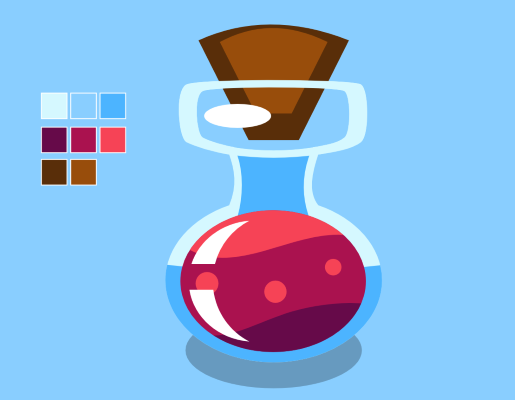
4. In order to depict the glass we use shades of blue. But you can also use shades of gray, green or dark blue colors for this.
You can download SVG-file with color palette for practice here
Add a volume to cap by duplicating, scaling down its shape and coloring it with lighter color. Fill the liquid shapes with three colors, from light to dark.
5. Let’ add more volume to our bottle. Mostly we’ll need duplicates of basic shapes, Bezier Tool (Shift+F6) and Path > Intersection function to create shapes, which we will fill with darker colors. The upper light stroke-like object is needed to add depth, which we'll get by placing cap right behind it.
6. The final step is to add highlights to our highly reflective surface. Use Ellipse and Bezier Tools (Shift+F6) for it.
Different sizes

You don’t always need a large or highly detailed object. If it’s an icon or a game object, you need to consider how its details look at small sizes. In our example, the bottle can’t be called highly detailed, but in smaller sizes its parts are quite well readable and recognizable.
How can you track changes at smaller sizes of the object in Inkscape?
-
View > Duplicate Window duplicates window in which you are working on. Working area in duplicate window can be zoomed out. So you can use primary window for detailed work while keeping watch over how the work looks in small size.
-
View > Icon Preview allows you to see selected object or area as an icon of different sizes.
-
Another great way to see how the object will look in different sizes is to create its clones. Go to Edit Menu > Clone > Create Clone. The clone of the object will appear right above the original. Then you can duplicate this clone or create new clones following the same way. Set clones to the desired size and change color or shape of the original.
When you ungroup the original object (if it is a group), clones will unlink automatically. To avoid this, you should use Node Tool (F2) for selection or work in group itself (Ctrl+Left Mouse Button).
Variations
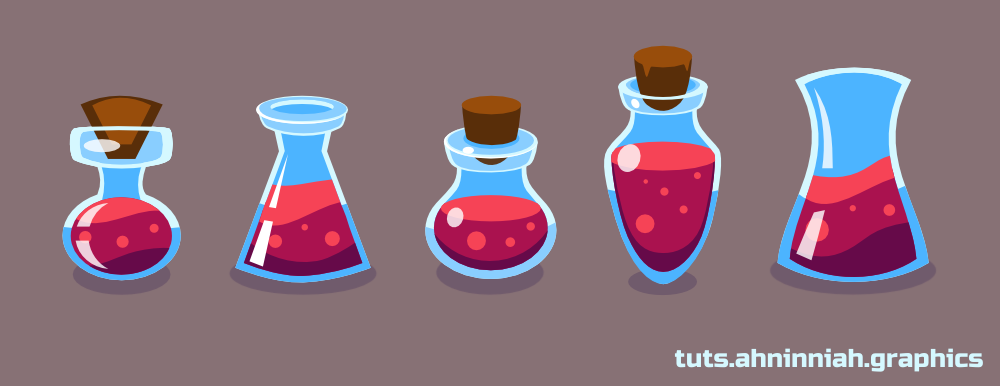
By modifying the shape of the vessel or the type of its neck you can get many bottle variations. Also don't forget to experiment with color of potion. You can also add some additional features like smoke or boiling animation (if it’s meant for game or cartoon).
Video process
Here is a short video process of creating bottle with potion. Take a look, if you got stuck on something.
That’s all for now! Please, post your results in the comments. And if you like the tutorial, please, share it :)
Buy Potions Pack inspired by this tutorial | Download this tutorial in PDF
buy