

How to make a Jigsaw puzzle with Gimp and Inkscape
 One day I needed to create a Jigsaw puzzle. And here how I’ve done it with Gimp and Inkscape. I hope it’ll be useful.

The first thing we need to do is to create the basis for our puzzle - a path wich will cut our image to pieces. For that we need to download and install special extension for Inkscape by Neon22, that creates jigsaw shaped pieces (How to install extension in Inkscape). After installation, we can find it here: Extension > Render > Lasercut Jigsaw.
My image has 1000x700px resolution. So I launch the extension and set my width and height parameters
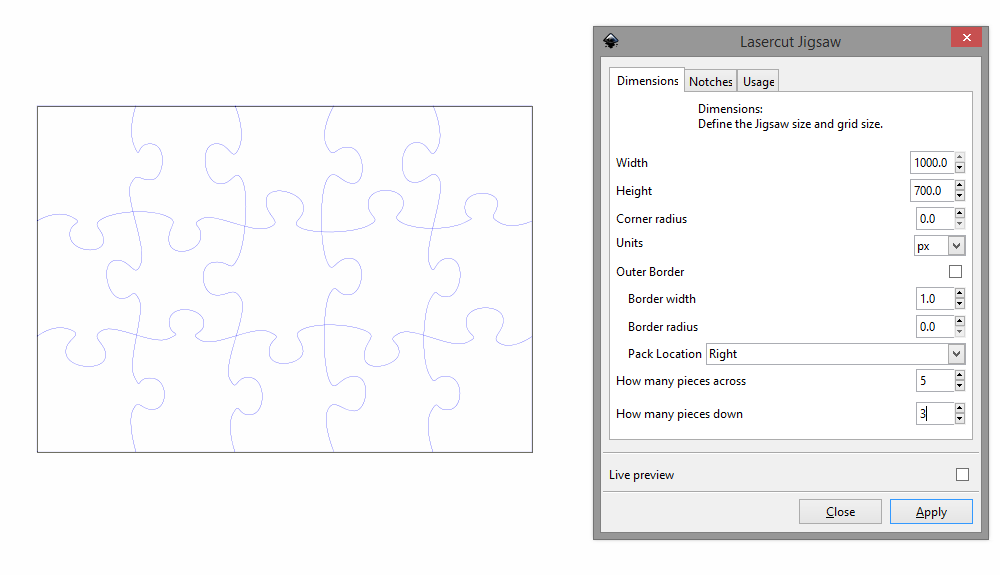
Note: 1000 height and width is the maximum
The next thing we need to decide, how many puzzle pieces we want to create. I chose 5 pieces across and 3 pieces down. Then Press Apply.
What we now have - is a group of paths. In order to proceed, we need that each puzzle piece was closed and has its own path. So we ungroup the puzzle template (Shift+Ctrl+G several times), select all curving lines and go to Path > Combine or press Ctrl+K.
Selection Tip: Select all (Shift+A) and then, holding down the Shift Key, deselect the border shape
Now they all became one object. Then we select it and the remaining border shape and go to Path > Division or press Ctrl+/
Note: Make sure that the inner object is on top (go to Object > Raise to Top or press Home key). Otherwise, it won’t work
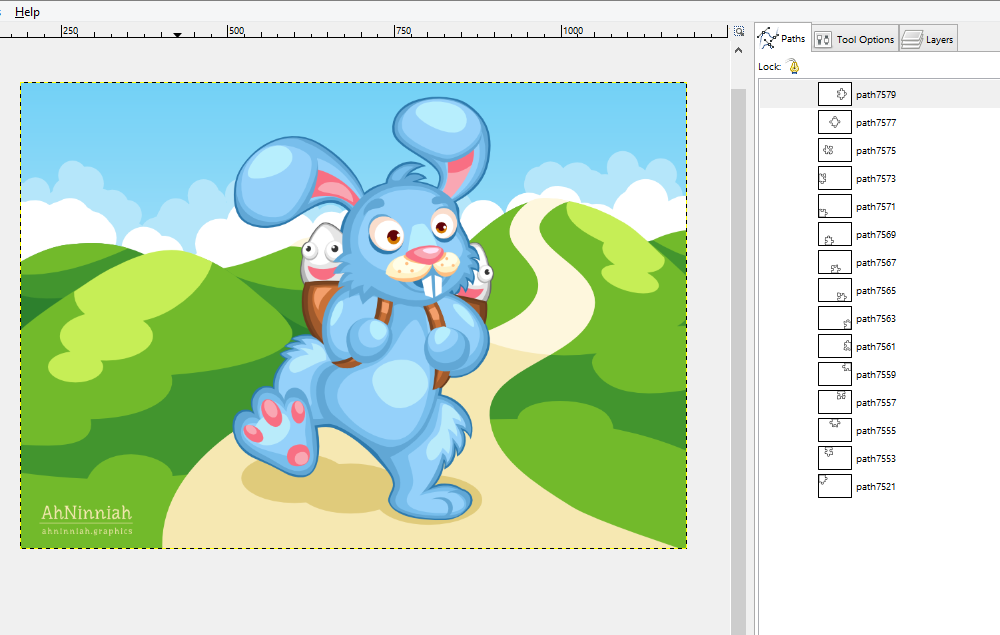
Save your template as an svg and move to Gimp. Open there your initial image, go to Tools > Paths and import our svg by right clicking on the Tab. Further, we need to download special plugin for Gimp by devolonter (How to install plugins in GIMP).
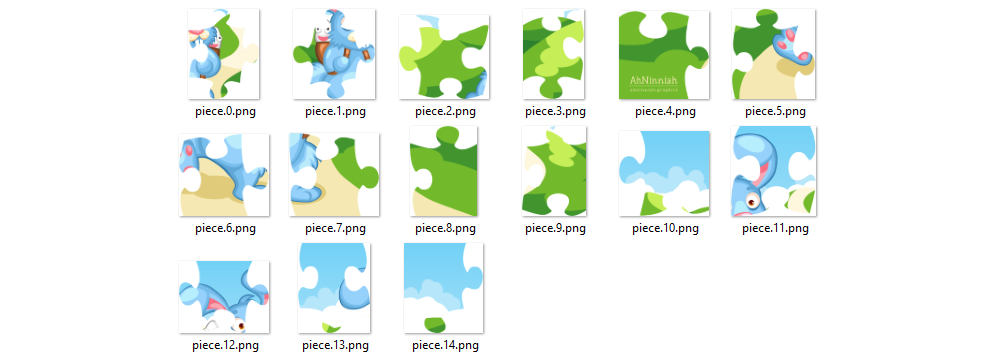
After installation, go to Filters > Paths > Cut to pieces, сhoose directory and press OK. And Voila! We have our image cuted to jigsaw puzzle pieces!
That’s all for now! Please, post your results in the comments. And if you like the tutorial, please, share it :)
* Download this tutorial in PDF